


← All help topics · Practitioner
Your project is the place where you record decisions and work through the steps. Start with a name you will recognise in your project list.
On desktop #
- Open My workspace and choose My Projects.
- Choose Create New. The Create New Project form opens.
- Enter a Project Name. Review the Members section and the team shown in the form.
- Use Add member only if you are ready to choose a contributor. You can start with the team shown in the form.
- Choose Submit when the required fields are complete. To leave without creating a project, choose Go Back or close the form.
On mobile #
- Open My workspace and enter My Projects.
- Tap Create New. Enter the project name in the form.
- Scroll inside the form to review Members and reach the action buttons.
- Tap Submit once the required fields are complete; close the form to cancel.
Explore a realistic demo project #
Try a filled example before entering your own project data. Choose the scale and context closest to your work: a coffee chain, a software product or an EV charging network. The menu identifies this as your own demo copy.
- Open a project step, such as Explore the Background.
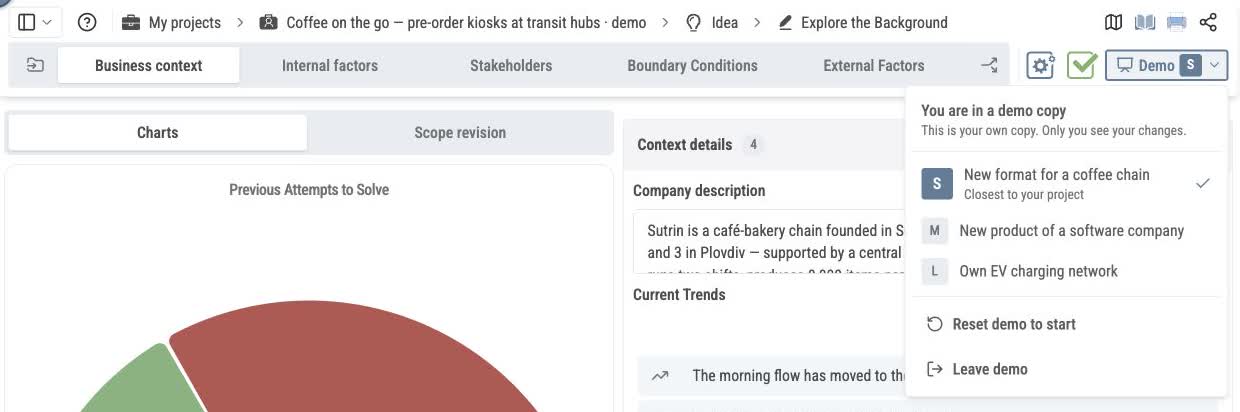
- In a wide workspace, open Demo at the right of the step tabs. In a compact workspace, open the step’s Open menu control and find Demo. This is different from the breadcrumb’s More actions menu.
- Choose S for the coffee-chain example, M for the software-company example or L for the EV charging network. Wait for the project name in the breadcrumb to change.
- Explore the populated tabs. Check that the menu says You are in a demo copy before editing.
- To compare examples, reopen Demo and choose another scale. Return to the same example to continue your copy.
- Open a project step, then tap Open menu at the right of the step tabs.
- Scroll within the menu if necessary and choose one of the three examples under Demo.
- Wait for the selected example and project name to change. The menu confirms that you are working in your own demo copy.
- Reopen the same menu to switch examples and return to the copy you were editing.
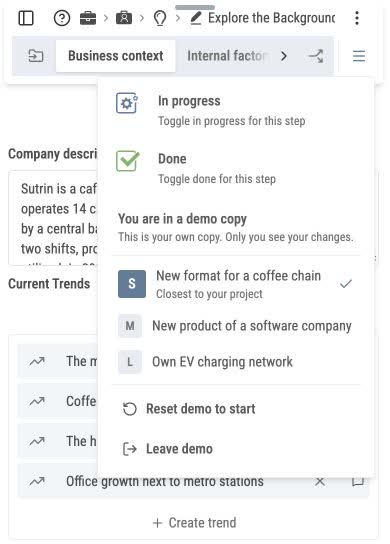
The demo copy was available while the tested Free account’s own active-project slot was already occupied. Use the project name and demo indicator to keep example work distinct from your own live project.
Find a project again #
- Use Recent for recently opened work, or My projects for projects you own.
- Type part of the name in Search projects. Check the current tab if no result appears.
- Use Projects shared with me for project access granted by another person. Link access is a separate route for shared links.
- Check Archive when a project is no longer in your active list.
If you cannot create or edit #
The active-project counter shows usage against your current allowance. Check My membership if the allowance is reached. When Own project limit reached appears, choose Cancel to return to the creation form; the name you entered is kept. Closing a changed form then asks whether to discard the unsaved changes. A project opened with View only access is for reading: it does not give you permission to change its records. Check the project and account before trying again.
Choose your next step #
Open the project, use the step selector in the breadcrumb and choose the relevant step. The Lifecycle Map explains where a step belongs; the step article explains the method. You do not have to reproduce the entire map in your project notes.
Interface reviewed on 12 November 2026. Screens shown are from the development environment.


